
Reviewed · WORKSHOPS
Chopstick Making Workshop in Ginza
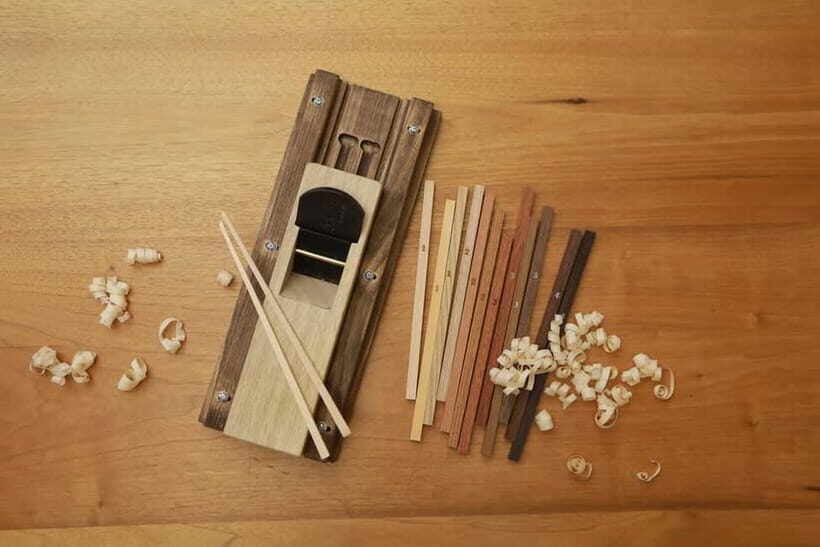
There’s something satisfying about making tools you’ll actually use. This Ginza chopstick workshop takes you through the real steps: pick your wood, shape it with a plane, smooth it with sandpaper, then finish with oil. It’s hands-on, skill-based, and set right in the middle of Tokyo.
I love the freedom to choose from 24 types of wood and two lengths, then take home a pair you customized. I also like that the process is step-by-step with English-capable staff, so you aren’t guessing what to do with the tools. One thing to consider: this is not a passive craft. Planing takes some strength, and specialty wood and engraving cost extra.
In This Review
- Key things I’d pencil into your plan
- Ginza Workshop Setup: What Happens the Minute You Arrive
- Pick Your Wood in Ginza: 24 Types, Two Lengths, and a Smart Upgrade Strategy
- Planning With a Hand Plane: Where the Strength and Skill Kick In
- Sandpaper Smoothing and Oil Finish: Getting That Polished Look
- Optional Laser Engraving: Names and Phrases That Make It Personal
- Price and Value: What $25 Covers and What Can Add Up
- Who This Workshop Fits Best (and Who Might Want to Skip It)
- Location and Timing: Making Your One Hour Actually Work
- Should You Book the Chopstick Making Workshop in Ginza?
- FAQ
- How long is the chopstick making workshop?
- What’s included in the price?
- Can I choose the wood type and length?
- Are there extra charges for better wood or engraving?
- Can I take the finished chopsticks home the same day?
- What languages are supported during the workshop?
- Where is the meeting point?
- Is the workshop wheelchair accessible?
- Is there cancellation coverage if my plans change?
Key things I’d pencil into your plan
- 24 wood choices plus two chopstick lengths, so you can match the feel you want
- You shape with a hand plane (real technique, not just decoration)
- You finish with sanding on tips and corners, then oil for a clean, polished look
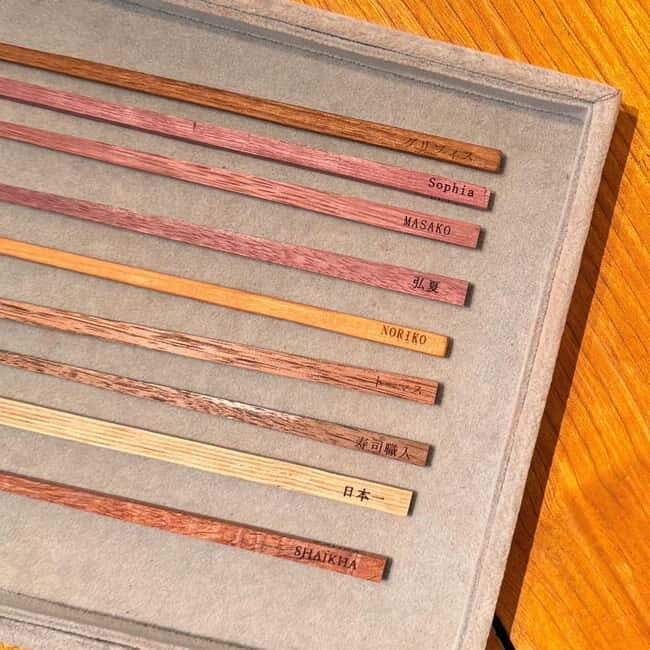
- Optional laser engraving lets you add a name or phrase in Japanese or your native language
- It’s 1 hour, so timing matters if you want to slow down for precision
More things to make with your own hands
- Sushi Making Tokyo Roll and Authentic Japanese Sushi Class★ 5.0 · 3,971 reviews
- Tokyo Shinjuku Chopsticks Making Class★ 5.0 · 1,763 reviews
- Chopstick Making Workshop in Ginza★ 4.8 · 1,366 reviews
Ginza Workshop Setup: What Happens the Minute You Arrive
The workshop is built around a simple idea: you pick the materials, then you do the work. When you get started, you’ll choose your chopsticks (wood type and length) and get oriented to the tools you’ll use.
It helps that the staff can speak English, and the space is geared for visitors who may be new to woodworking. Multiple instructors rotate around different stations, so you can get quick fixes if you’re unsure about pressure, angle, or sanding progress.
Also, this place is run by a woodworking company. That matters because the emphasis is on materials and finishing, not flashy presentation. You’re not watching a craft show. You’re making something functional, with an actual surface you shaped and a finish you applied.
A realistic note: the shop can feel busy because you’re sharing the class time with other makers. The upside is that you’ll almost always find help. The downside is that you may need to focus and move with the flow to finish within the hour.
Pick Your Wood in Ginza: 24 Types, Two Lengths, and a Smart Upgrade Strategy
This is where your chopsticks stop being a generic souvenir. You can choose from 24 wood types and two lengths. The workshop also clearly separates which woods are included and which are upgrades.
Here’s the practical way to think about it:
- 5 wood types are included with the base price
- The remaining 19 higher-grade woods cost extra
In other words, you can keep the total simple by choosing one of the included options. Or you can treat it like a mini “choose-your-finish” upgrade and pay for a wood you’ll love long-term.
From the experience, the most useful decision is not just how the wood looks, but how it works. People end up surprised by how different woods feel when you plane and sand. One wood might shave smoothly. Another might be harder and require more control. That’s normal here, and it’s part of the satisfaction.
If you’re with family, you can also play with choices: one person can make a straightforward included wood pair, while someone else tries a specialty wood. Then you can compare what you learned about grain, firmness, and finish.
Planning With a Hand Plane: Where the Strength and Skill Kick In
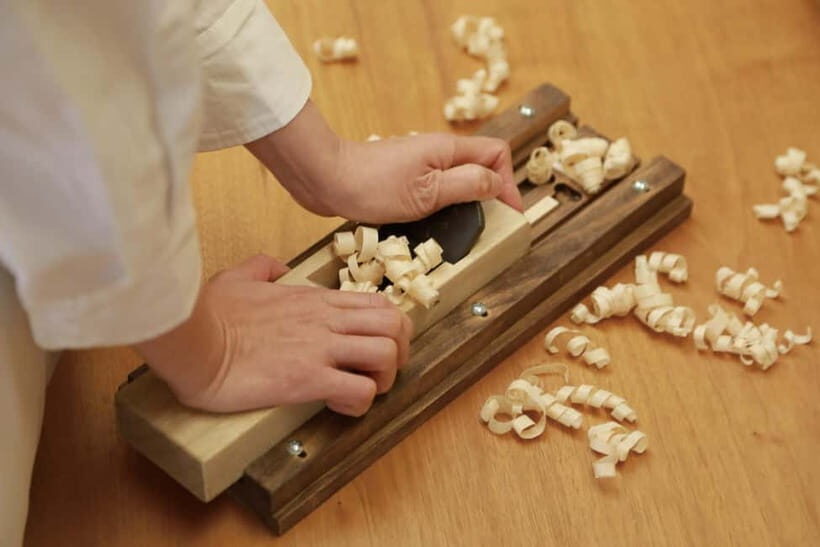
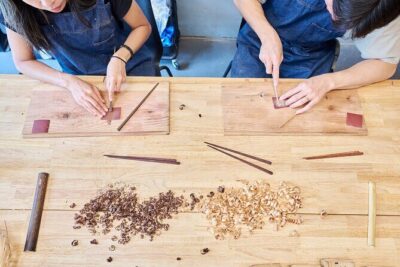
The core of the workshop is carving by planing. You place the chopsticks on the stand, then use a plane to shave the wood down toward the shape you want.
This step is not a gimmick. It takes some effort. Several people describe needing real arm strength to keep the plane moving and taking off thin, even shavings. That’s why it feels more rewarding than many “paint-a-thing” crafts.
The instructors will guide you through technique, but you still control the rhythm. If you’re nervous about tools, don’t be. What matters most is consistent pressure and attention to how the wood responds.
You’ll also be working toward a final silhouette, not just flattening. So as the shape gets close, you’ll want to slow down a bit and check your progress more often.
A small practical tip: pay attention to corners and edges early. The workshop later has you smooth tips and corners with sandpaper, but you’ll get a better end result if the early shaping isn’t too rough. It’s easier to refine than to repair.
Sandpaper Smoothing and Oil Finish: Getting That Polished Look
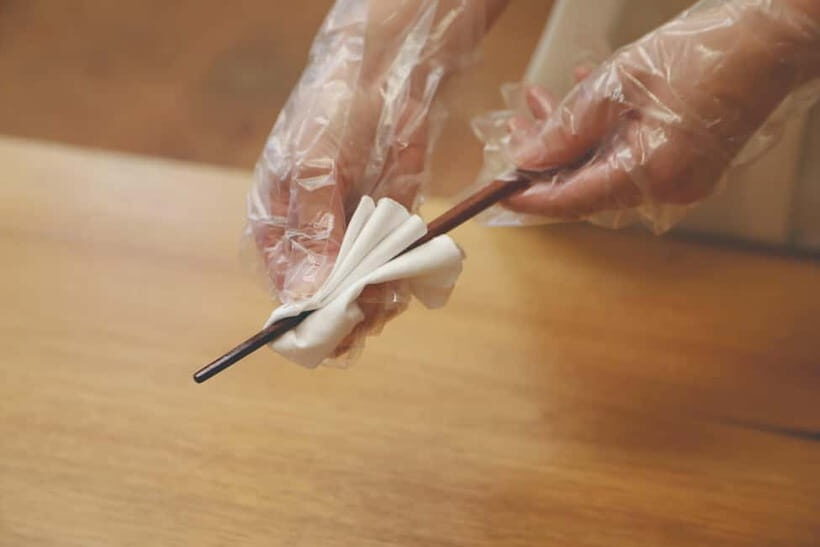
After planing, you move into refinement. You smooth the tips and corners using sandpaper, aiming for a shape that feels comfortable in-hand and ready for use.
Then comes the finish: you coat your chopsticks with oil. This step is what turns your shaved wood into something that looks complete. The oil helps the surface feel nicer and gives the wood a finished tone instead of a raw, matte look.
A useful mindset here is: sanding is for feel. Planing is for form. If your chopsticks look close but feel rough, sanding will fix that. If your chopsticks feel smooth but the shape is off, planing is where you correct it next time you work on your pair.
People also mention that the class pacing feels relaxed. The workshop isn’t designed to race you to the finish line, which is great if you want to take your time on sanding precision.
And yes, you can take the finished chopsticks home the same day, so you’re not waiting for shipping or a later pickup.




Optional Laser Engraving: Names and Phrases That Make It Personal
If you want the most personal souvenir possible, add engraving. The workshop offers optional name engraving using a high-performance laser designed to put gentle stress on the wood.
You can engrave your name or even a favorite phrase. People report being able to do this in Japanese or their native language, which is a big deal if you want something meaningful rather than just a straight transliteration.
Cost-wise, engraving is an extra fee: ¥1,100 is listed as the additional charge. Some review details describe it as ¥1,100 per pair, which fits the idea that you’re personalizing the set you make in class.
Is it worth it? If you’re the type who still uses souvenirs after the trip, engraving is one of those upgrades that actually changes how often you’ll pull the chopsticks out at home. A plain set already works. Engraving makes them yours.
In the shop, instructors also help translate what you want into a Japanese-appropriate form, which can prevent awkward spelling or mismatched characters.
Price and Value: What $25 Covers and What Can Add Up
At the headline level, it’s about $25 per person for a 1-hour workshop. The big value piece is that your price covers the core activity: making the chopsticks with tools and materials, plus an English-speaking guide fee included (listed as ¥1,000 in the experience fee).
Then the costs split into two optional areas:
1) Wood upgrades
Only 5 wood types are free. If you choose from the other 19 higher-grade woods, you’ll pay extra.
2) Engraving
Optional, additional ¥1,100.
So the smartest way to protect value is to decide your budget goal before you pick wood. If you’re okay with a included wood type, you’ll stay close to the base price. If you want a specific premium feel, plan to pay the difference up front mentally, so it doesn’t surprise you at checkout.
Also consider that you’re not just buying “a souvenir.” You’re buying a short lesson in real tool use and finishing. You’ll leave with a pair you can use for everyday meals, plus a story you can explain in one sentence: I shaped these from start to finish.
Who This Workshop Fits Best (and Who Might Want to Skip It)
This workshop is ideal if you want a hands-on Tokyo activity that stays grounded in practical craft. It’s a good match for:
- Couples and friends looking for a shared task
- People who enjoy making things with their hands
- Families with kids old enough to follow tool instructions and keep focus
- Anyone who wants a use-at-home souvenir
It’s less ideal if you’re expecting a light, sit-and-watch activity. Planing takes strength, and sanding takes patience. One review describes it as like woodworking without electric tools, which is exactly what you should expect.
The provided suitability notes also say it’s not suitable for children under 3 and people over 70. Wheelchair access is listed as available, and the staff will assist you.
Language support is another big plus. English-speaking staff are there, and instructors can help you through steps. In reviews, specific instructors are named, including Tina, Waka, Kotoha, Shion, and Koko—so if you’re lucky, you’ll get an instructor who explains clearly and stays patient while you catch up.
Location and Timing: Making Your One Hour Actually Work
The meeting point is 2-9-13 Ginza, Chuo-ku, Tokyo. Since the duration is 1 hour, it’s worth treating this like a timed activity, not a casual stop between errands.
Ginza is packed with things to do, so I’d plan your hour as a clean block. Do it when you’re not rushed and when you can focus on your tools and finish.
Also, because the workshop can be busy, don’t plan a right-after appointment that leaves no buffer. You want a calm window to confirm you’re happy with the final sanding, then handle the take-home finish properly.
If you arrive early, you may be able to start promptly, but it’s still best to show up when your slot begins so the staff can place you in the right stage of the workflow.
Should You Book the Chopstick Making Workshop in Ginza?
Book it if you want a Tokyo souvenir with real utility: chopsticks you shaped, finished, and can personalize. The wood choice, the plane-and-sand process, and optional laser engraving make it feel meaningful rather than mass-produced.
Skip it if you’re looking for something extremely low-effort or if you’re worried about using a plane and doing the physical shaping work. The hour is short, but the craft is real.
My take: it’s one of the better “hands-on Tokyo” experiences because the skills and the outcome both last. You’ll likely use the chopsticks at home, and you’ll remember the part where your arms actually had to do the work.
FAQ
How long is the chopstick making workshop?
The workshop lasts 1 hour.
What’s included in the price?
The experience includes the chopstick making workshop, use of tools and materials, and English-speaking staff. The guide fee of ¥1,000 is included in the experience fee.
Can I choose the wood type and length?
Yes. You can choose from 24 types of wood and two different lengths.
Are there extra charges for better wood or engraving?
Yes. 5 wood types are free, and the other 19 higher-grade woods cost extra. Optional name engraving costs an additional ¥1,100.
Can I take the finished chopsticks home the same day?
Yes. You can take the completed chopsticks home on the day.
What languages are supported during the workshop?
The staff and instructor support English and Japanese.
Where is the meeting point?
The meeting point is 2-9-13 Ginza, Chuo-ku, Tokyo.
Is the workshop wheelchair accessible?
Wheelchair accessibility is listed as available.
Is there cancellation coverage if my plans change?
Yes. Free cancellation is available up to 24 hours in advance for a full refund.
Make Something to Take Home


More Tour Reviews in Tokyo



Fresh reviews from around Tokyo





Workshops, compared.
 ★ 5.0Sushi Making Tokyo Roll and Authentic Japanese Sushi ClassFrom $593,971 reviews
 ★ 5.0Tokyo Shinjuku Chopsticks Making ClassFrom $201,763 reviews
 ★ 5.0Tokyo Sushi Making Class in Tsukiji with Professional ChefFrom $491,177 reviews
 ★ 5.0Ramen & Gyoza Cooking Class in Tokyo with Local Supermarket VisitFrom $122823 reviews
 ★ 5.0Matcha Making Class in Tokyo with Authentic Japanese Sweets SetFrom $21744 reviews
 ★ 5.0Samurai Sword & Archery Class from Samurai DescendantFrom $193603 reviews
 ★ 4.9Tsukiji Fish Market Sushi Making Class with Pro ChefFrom $63506 reviews
 ★ 5.0Tokyo Chopstick Making Workshop with ArtisanFrom $26466 reviews
Browse the lists this tour appears in