
Tokyo makes a great city for two wheels. This 3-hour bike or e-bike tour is built for covering a lot of ground without feeling like you’re sprinting between subway stops. You’ll roll through the temple area near Shiba Park, then head toward the Yoyogi/Shibuya side for modern Tokyo moments and street-life energy.
I like that the tour focuses on smart “see it, know it, move on” pacing, so you get context at each stop rather than just a quick photo. I also like the gear: you can ride high-quality bikes (Bianchi and Fuji options, plus e-bikes), and there’s even a mini pouch on the bike for your phone, wallet, and keys.
The main drawback to plan for: much of the route includes photo stops and short guided moments, so it’s not the tour for long, slow wandering at one place.
In This Review
- Key highlights to look forward to
- Why a Shiba-to-Shibuya bike route works so well
- Meeting at the Statue of Commodore Perry (and actually finding it)
- Bikes, e-bikes, and that tiny pouch you’ll be grateful for
- Your 3-hour route: Perry to Shibuya, with palace gates and street style
- 1) Starting at the Statue of Commodore Perry
- 2) Zojo-ji Temple (photo stop plus guided tour)
- 3) Tokyo Imperial Palace (quick photo stop with context)
- 4) Ōte-mon Gate (short photo stop, short guided time)
- 5) State Guest House Akasaka Palace (photo stop)
- 6) New National Stadium (photo stop)
- 7) The in-between lesser-known stop (visit time)
- 8) 3 Chome Minamiaoyama (short visit)
- 9) Cat Street (short visit)
- 10) Miyashita Park (very short visit)
- 11) Shibuya Crossing (photo stop plus visit time)
- 12) Finish at the Bell of Peace
- Photo stops vs real time: how to make 3 hours feel worth it
- Safety, heat, and the small comfort details
- Who should book the e-bike version, and who should skip cycling
- Price at $60: what you’re paying for (and what you’re not)
- Should you book? My call for most first-timers
- FAQ
- How long is the Tokyo bike or e-bike tour?
- Where do we meet the guide?
- Are e-bikes available?
- What’s included in the price?
- Are helmets included?
- What should I bring?
- Is the tour offered in English?
- Who is the tour not suitable for?
Key highlights to look forward to
- Bianchi and Fuji bikes (plus cross-bike options) for a smoother, more comfortable ride
- E-bike option for lower stamina or anyone who doesn’t cycle much
- English-speaking guides who keep the pace organized and share local context
- A tight 3-hour route that links temples, palace-area landmarks, and Shibuya
- Bike insurance and a guide watching the group so you feel safer on busy streets
- Quick photo stops plus short visits to several stops along the way
More of Tokyo by bike
- Tokyo Guided Small-Group Biking Tour★ 5.0 · 1,250 reviews
- Tokyo Great Cycling Tour★ 5.0 · 811 reviews
- Tokyo Top Highlights 3h Guided E-bike Tour★ 5.0 · 714 reviews
Why a Shiba-to-Shibuya bike route works so well
Tokyo is famous for being efficient, but getting around by subway can feel like your day becomes a series of transfers. This kind of Tokyo bike tour changes the rhythm: you move continuously, and the city comes at you in real time. From the Shiba-area temples to Shibuya’s iconic crossroads, you get a clear sense of how old and new Tokyo sit side by side.
The route also helps you build a mental map fast. After a single 3-hour ride, you’ll understand where neighborhoods connect and why certain streets matter. That makes it easier to plan the rest of your trip—walking days feel less confusing.
And yes, it’s fun. Cycling through traffic while your guide keeps you on track is a different kind of sightseeing—more active, more immediate, and usually more memorable than standing in one place.
Meeting at the Statue of Commodore Perry (and actually finding it)
Your meetup is by the Statue of Commodore Perry, with a short walk (about 3 minutes) from Daimon Station, A6 exit. This is one of those Tokyo meeting points where being even a few minutes late can cost you a lot of time.
I’d show up a little early, not because you’ll be in trouble, but because it gives you breathing room to orient yourself on the sidewalk. Once you spot the statue area, the rest is straightforward: the guide will be there with the bikes.
If you’re doing this as part of a busy day, pencil it in like an appointment. You’ll get more out of the tour if you start calm, hydrated, and ready to ride.
Bikes, e-bikes, and that tiny pouch you’ll be grateful for
The biggest practical win here is that you’re not left improvising equipment. You can choose a standard bike setup, including road bikes and cross bikes from reputable brands like Bianchi and Fuji, or you can select an e-bike option if long-distance riding isn’t your thing.
Here’s how I’d decide:
- If you’re comfortable pedaling and want a more classic cycling feel, a non-assisted bike makes sense.
- If you’re not used to cycling, want to avoid fatigue, or you’d rather spend energy on sights than legs, the e-bike option is the smarter pick.
It’s also worth noting the setup includes on-bike storage. There’s a mini poach (on the bike) to hold things like your phone, wallet, and keys, which means less juggling and more time looking around. That small convenience matters in Japan, where you’ll likely be stopping for photos a lot.
And you’ll get bike insurance included with the tour, which is one of those “you don’t think about it until you need it” details.
Your 3-hour route: Perry to Shibuya, with palace gates and street style
This tour keeps a tight loop through central Tokyo. The guide-led stops are mostly short—think photo moments plus brief guided context—so you’ll see a lot without losing the group.
Bigger sweeps: other Tokyo city tours

1) Starting at the Statue of Commodore Perry
You begin at the statue area, which works well as a first landmark because it’s easy to locate and sets a historical tone immediately. It’s a good “warm-up” moment before the ride picks up.
2) Zojo-ji Temple (photo stop plus guided tour)
Next is Zojo-ji Temple, with a short photo stop and guided time (about 15 minutes). Even with limited time, a temple stop early in the tour helps you switch from modern streets to a more traditional Tokyo mood.
This is also the kind of stop where you’ll want your phone camera ready, because the guided moment is built to give you a sense of what you’re looking at before you move on.
3) Tokyo Imperial Palace (quick photo stop with context)
Then you head to the Tokyo Imperial Palace area for a brief photo stop and guided tour (about 10 minutes). The point here isn’t a long stay; it’s a snapshot that shows you how the palace grounds shape the surrounding city.
Because your time is limited, listen closely during the guide’s explanation—you’ll get more out of it than just looking at the buildings from the bike seat.
4) Ōte-mon Gate (short photo stop, short guided time)
The route continues to the Ōte-mon Gate, with a very short photo stop and guided explanation (around 5 minutes). It’s quick, but these short pauses are exactly what makes the 3-hour format work.
If you like photos but also like context, this style fits you. If you want long lingering, you might feel the pacing is brisk.
5) State Guest House Akasaka Palace (photo stop)
You’ll also pass by the State Guest House Akasaka Palace for a photo stop (about 10 minutes). This is another “see it, understand the vibe, move on” moment.
In a tour like this, these stops function like anchors. They’re there so your ride doesn’t turn into a blur of neighborhoods.
6) New National Stadium (photo stop)
The New National Stadium is next for a photo stop (about 10 minutes). It adds a modern Tokyo landmark feel right after palace-area sights, so you get that sharp contrast Tokyo is known for.
If you’re into architecture or stadium culture, you’ll likely appreciate how the route places it where your eye can shift gears.
7) The in-between lesser-known stop (visit time)
After the major landmarks, there’s a hidden stop/visit segment (about 15 minutes). The goal is to break up the big-name locations with something more low-key, so you’re not only seeing the famous outer shell.
This is also a good moment to ask your guide questions. When the schedule allows a short visit, you can usually get better answers about what to do next in the city.
8) 3 Chome Minamiaoyama (short visit)
You’ll make a short visit (about 5 minutes) in 3 Chome Minamiaoyama. This is where you start feeling the neighborhood textures more than the headline sites.
Even short stops can work well if you focus on details: street layout, storefront rhythm, and how the area transitions into the next one.
9) Cat Street (short visit)
Next is Cat Street for about 5 minutes. This is the kind of street stop that gives you a Tokyo side you can’t fully replicate just by reading about it.
Expect a quick look and a guided framing so you know what you’re seeing—then back on the bike.
10) Miyashita Park (very short visit)
At Miyashita Park, you’ll spend about 3 minutes. It’s brief, but it’s positioned to give you a modern public-space moment before the main finale.
If the weather is nice, it’s the kind of stop where you’ll probably want a quick scan for people-watching or photo angles.
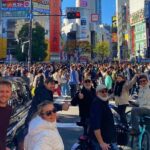
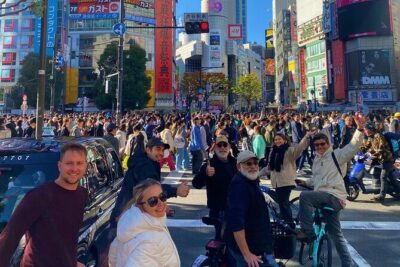
11) Shibuya Crossing (photo stop plus visit time)
Finally, you reach Shibuya Crossing for a photo stop and a short visit (about 5 minutes). This is one of Tokyo’s most recognizable scenes, and on a bike tour, it lands with extra impact because you’ll have “traveled into it.”
Your best move: take the classic photo, then use your guide’s timing to catch the flow without spending the whole moment stuck in a crowd.
12) Finish at the Bell of Peace
You finish at the Bell of Peace. It’s a neat way to end—less chaotic than the crossing, and it gives your ride a calmer final beat.
By the time you reach the end, you should feel like you’ve connected the dots between Tokyo’s traditional temple side and its fast-moving, modern street culture.
Photo stops vs real time: how to make 3 hours feel worth it
Because the tour is only 3 hours, you should expect a mix of quick photo moments and short visits. That’s not a problem—it’s the design. It means you see a lot without dragging yourself from one long stop to the next.
Here’s how to get the best experience anyway:
- If you care about photos, keep your camera ready before each bike pull-over.
- If you care about understanding, listen during the guided segments, even when you think you already know what it is.
- If you want deeper time at one place, treat this tour as the orientation stop, then plan a separate walk afterward.
The short “visit” segments are usually where your guide can help you notice what matters. If you want souvenirs, snacks, or extra views, you’ll likely prefer to do that outside the tour once you know the area.
Safety, heat, and the small comfort details
The tour includes bike insurance, and the guides keep the group organized so you feel more protected in traffic. The ride experience is also supported by the bike quality—road and cross bikes are easier to handle than random rentals, especially when you’re stopping frequently.
Tokyo’s summer heat can be intense, so this is where the practical advice matters. Bring water, wear comfortable clothes, and wear comfortable shoes you can move in for short stops.
Helmets: they are not included. You can rent one on site for an extra ¥1,000/unit in cash. If you’re riding a standard bike, I strongly recommend using a helmet anyway; it’s a small extra step that reduces risk.
Who should book the e-bike version, and who should skip cycling
This tour has clear boundaries. It’s not suitable for children under 12, pregnant women, people with back problems, or anyone who can’t ride a bike.
If you fit those limits but you’re still unsure about distance, choose the e-bike option. The tour specifically recommends it if you don’t cycle often or don’t have much stamina. That’s a smart way to keep the experience about sightseeing, not exhaustion.
If you’re an experienced cyclist, you may enjoy the standard bike more. Either way, the goal is to stay safe, keep you moving, and keep the city flowing around you.
Price at $60: what you’re paying for (and what you’re not)
At $60 per person for about 3 hours, you’re paying for three things: a guide, a quality bike setup, and a planned route that saves you time. In Tokyo, time is the real currency, and cycling with a guide often beats spending hours figuring out connections.
This isn’t a luxury “linger all day” tour. It’s a focused sprint through major landmarks and neighborhood flavor. If that pacing matches your style—quick context, then movement—this price feels fair.
One cost note: helmets cost extra (+¥1,000/unit), and child seats cost extra (+¥3,000/unit). If you’re comfortable biking without extra rentals and you’re booking as an adult with a plan to bring water and a helmet if needed, your total cost stays predictable.
Also, the tour offers private or small groups. If you’re booking with someone you trust or want more room for questions, that format can turn a short tour into a more personal one.
Should you book? My call for most first-timers
I think this tour is a strong pick if you want an efficient introduction to Tokyo without getting stuck in the subway loop. It’s especially good if you like your sightseeing with motion—cycling past temples, palace-area landmarks, stadium scenery, and then finishing at Shibuya Crossing.
I’d only hesitate if you know you want long time inside one place. This tour is about coverage and orientation, not slow museum pacing. And if you’re worried about finding the meeting spot, plan to arrive early and don’t assume you’ll spot it instantly.
If you want Tokyo in 3 hours, with English-speaking guidance, quality bikes, and a route that links old and new sides of the city, booking is an easy yes.
FAQ
How long is the Tokyo bike or e-bike tour?
The tour duration is 3 hours.
Where do we meet the guide?
Meet around the Statue of Commodore Perry. It’s about a 3-minute walk from Daimon Station (A6 exit).
Are e-bikes available?
Yes. You can select the e-bike option if you’re not comfortable riding long distances or you don’t have much stamina.
What’s included in the price?
A friendly, knowledgeable English-speaking guide, high quality bikes (and an e-bike option), local insights and stories, a mini poach on the bike, and bike insurance are included.
Are helmets included?
Helmets are not included. You can rent them on place by bringing ¥1,000 cash per unit.
What should I bring?
Bring comfortable shoes, water, and comfortable clothes.
Is the tour offered in English?
Yes. The live tour guide speaks English (and Japanese).
Who is the tour not suitable for?
It’s not suitable for children under 12, pregnant women, people with back problems, or anyone who can’t ride a bike.
Tokyo on Two Wheels
More Tours in Tokyo

More Tour Reviews in Tokyo

Fresh reviews from around Tokyo

Cycling Tours, compared.
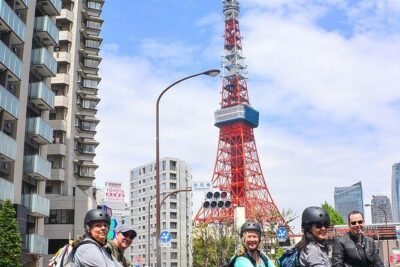 ★ 5.0Tokyo Guided Small-Group Biking TourFrom $1061,250 reviews
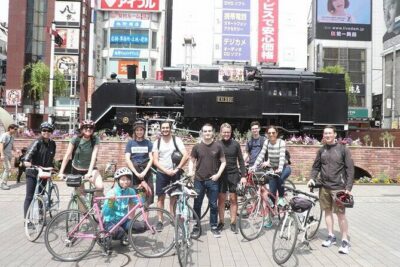 ★ 5.0Tokyo Great Cycling TourFrom $99811 reviews
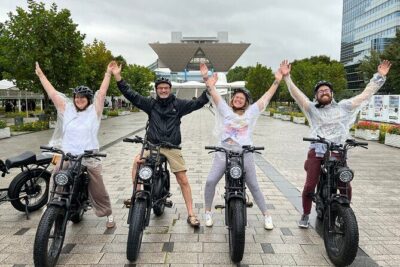 ★ 5.0Tokyo Top Highlights 3h Guided E-bike TourFrom $63714 reviews
3-Hour Bike or E-Bike City Highlights TourFrom $45435 reviews
★ 5.0Tokyo Top Highlights 3h Guided E-bike TourFrom $63714 reviews
3-Hour Bike or E-Bike City Highlights TourFrom $45435 reviews
 ★ 5.0Tokyo West-Side Cycling & Food TourFrom $99214 reviews
 ★ 5.03-Hour Bike/E-Bike Tour of the City’s HighlightsFrom $63209 reviews
 ★ 5.0Small Group Cycling Tour in TokyoFrom $66184 reviews
 ★ 5.03-Hour Tokyo Private E-Bike Tour Starting from Your HotelFrom $145117 reviews
Browse the lists this tour appears in