
Reviewed · PHOTOGRAPHY SESSIONS
Tokyo Cyberpunk Street Photo Tour
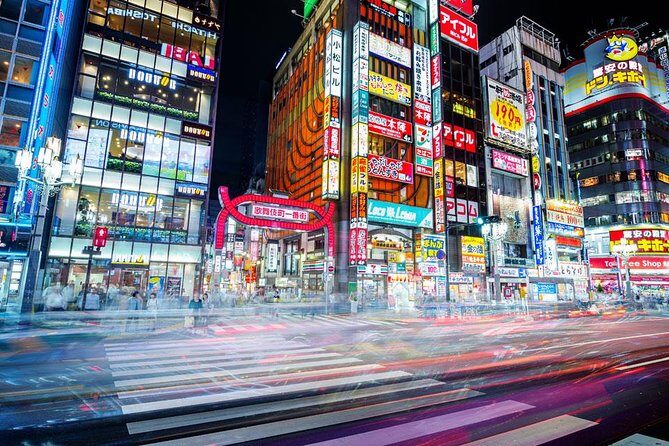
Neon nights turn into a photo lesson. This 3-hour Tokyo street shoot is built around Shinjuku and Shibuya after dark, where you practice long exposure and street-photo composition using either a camera or your smartphone. You’ll get hands-on coaching from instructors like Charles and Lukasz, with guidance tailored to what’s actually in front of you—signs, crowds, and that movie-set glow at Shibuya Crossing.
I love that it’s a true small-group format with personalized feedback, not a slow parade. Kabukicho’s neon corridors, Omoide Yokocho Memory Lane’s tight lanes, and the high-energy stop at Shibuya Crossing give you a mix of iconic and more characterful scenes. One consideration: the pace can feel brisk, so if you need extra time to frame shots or you’re easily separated in crowds, plan to stay close and speak up early.
In This Review
- Key things I’d circle before you book
- Tokyo cyberpunk glow: why this tour works at night
- Meet at Happy Lemon Shinjuku: your plan for a smooth start
- Your pro instructor: what you’ll learn (camera or phone)
- Stop 1: Kabukicho District for neon signs and street angles
- Stop 2: Omoide Yokocho Memory Lane for tight street texture
- Train hop to Shibuya: quick transit, big payoff
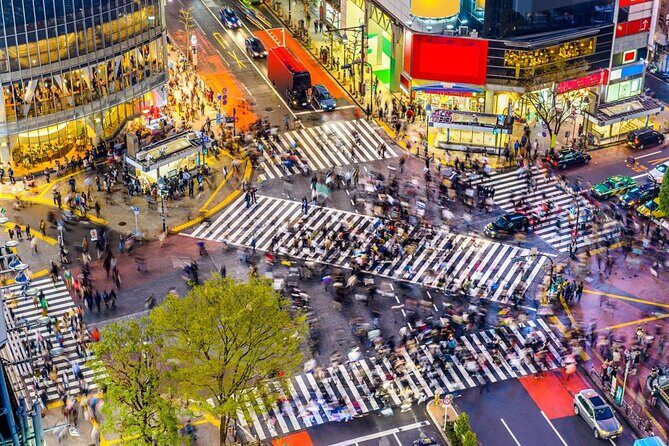
- Stop 3: Shibuya Crossing for crowd timing and long-exposure drama
- Practical settings for neon: getting usable results, fast
- Pace and group size: the good and the slightly annoying
- Price and value: is $184.99 per group fair?
- Who should book this Tokyo cyberpunk street photo tour
- Should you book it?
- FAQ
- How long is the Tokyo Cyberpunk Street Photo Tour?
- How many people are in the group?
- What time does the tour start, and where do we meet?
- Where does the tour end?
- What’s included in the price?
- Do I need a camera, or will a smartphone work?
- Is transportation included?
- What happens if the weather is bad?
- Is the tour refundable if I cancel?
Key things I’d circle before you book
- Small group size (max 4 people) helps you get real feedback instead of group lectures
- Shinjuku to Shibuya at night means you’re shooting Tokyo when the lights do the work
- Long exposure coaching for both cameras and smartphones so you can actually use the settings
- Kabukicho + Memory Lane gives you neon variety, from wide signs to narrow street texture
- Shibuya Crossing time is built for crowd-and-light effects with the Blade Runner vibe
- Stops list admission as free (so your cost mostly covers instruction and the walk)
More frames: other photo sessions in Tokyo
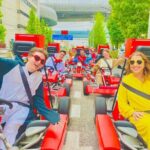
- Tokyo Go-Karting Experience: Shibuya Crossing with Photos★ 4.8 · 190 reviews
- Tokyo Cyberpunk Street Photo Tour★ 5.0 · 165 reviews
- Tokyo by Night Photography Tour (Private Option Available)★ 5.0 · 151 reviews
Tokyo cyberpunk glow: why this tour works at night
Tokyo is at its most cinematic after dark, and this tour is designed around that fact. The guide’s whole job is to help you translate what you see—neon signs, illuminated storefronts, and moving crowds—into photos that don’t just look like snapshots.
What makes it especially appealing is the combination of street photography practice plus an efficient route. You start in Shinjuku, then work your way toward Shibuya’s most famous intersection. That sequence matters because your eyes (and your camera) adjust over time: the first stop helps you warm up with lights and angles, and the last stop asks you to nail timing and exposure while lots of people move through frame.
You’ll also get the kind of practical guidance that helps immediately. In real-world terms, that means someone watching what you’re doing and correcting things like framing, exposure choices, and how you use your phone’s controls (including slider settings and how to keep things from drifting while you shoot).
Meet at Happy Lemon Shinjuku: your plan for a smooth start
The tour starts at 7:00 pm at the Happy Lemon Keio Shinjuku Shop area (1-chōme-1-4 Nishishinjuku, Shinjuku City). It ends at 2-chōme-2-1 Dōgenzaka, Shibuya, Tokyo after the Shibuya Crossing segment.
Why the meeting point matters: Shinjuku Station is huge. One common snag is simply finding the group on your first night in Tokyo. My advice is boring but effective: arrive early, use the map pin you’re given, and don’t assume you’ll “figure it out” once you’re inside. If you’re even slightly unsure, step back out of the station and confirm you’re at the correct sidewalk spot before you link up.
Also note the timing. Night tours are all about light and crowds. The best shots at neon intersections depend on being present when the scene is happening, not ten minutes later when the moment has already shifted.
Your pro instructor: what you’ll learn (camera or phone)
This tour includes a professional photography instructor, and the teaching approach is very hands-on. You’re not just told where to stand; you’ll get practical direction for how to shoot neon-lit streets, and then you’ll get chances to try it.
If you’re using a camera, the instruction focuses on settings that work for night scenes—especially the long exposure look that turns moving light into streaks. If you’re on a smartphone, you still get guidance that helps you control brightness and contrast and find the right tools inside your camera app. One person specifically mentioned how the guide helped them locate the contrast slider and use functions to prevent accidental changes while shooting—small things, but they can make your results dramatically more consistent.
A big reason people rave about this tour is that the guide adjusts to the group level. Some participants are brand new and just want good memories; others show up with more experience and want cleaner technique. In both cases, the instructor seems to aim for immediate improvement: practice, feedback, and quick corrections.
One more practical point: the tour is listed as suitable for most people, but it’s still a walking route through busy areas at night. If you’re wearing anything restrictive or you’re not comfortable standing and shooting in crowds, you’ll feel it by the end.
Stop 1: Kabukicho District for neon signs and street angles
Your first major stop is the Kabukicho District, with about 1 hour to work it. This is a strong opening because Kabukicho is full of illuminated storefronts, layered signage, and back-alley vibes—exactly the kind of environment where composition tips pay off.
Here’s what you’re really trying to learn in this section:
- how to frame neon without washing out the highlights
- how to find angles that give depth (signs in the foreground plus lights receding)
- how to shoot street-life moments without losing the “cyberpunk” color
Kabukicho also sets you up for the rest of the night. If you don’t nail the basic exposure and framing choices here, Shibuya Crossing will feel harder later because crowds and bright lights can overwhelm your settings.
One nuance from real night photography: you’ll likely need to experiment quickly. The best compositions might take a couple tries as people walk by, doors open, or lights shift. The guide’s value is that they point you toward positions that save time—so you’re not wandering in circles while the moment changes.

Stop 2: Omoide Yokocho Memory Lane for tight street texture
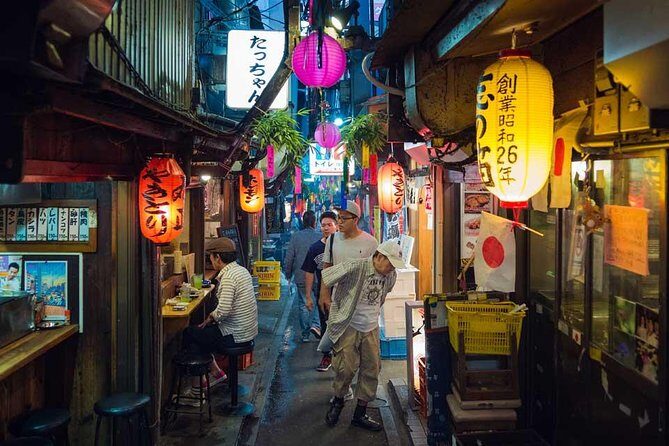
Next up is Omoide Yokocho Memory Lane for about 30 minutes. This stop feels different from Kabukicho. Instead of wide, layered neon signage, you’re dealing with a more compact street experience—perfect for photos that focus on texture, narrow lines, and the glow bouncing off close surfaces.
Why this part is worth your attention: it’s where you can get pictures that look less like “I saw Shibuya” and more like “I photographed Tokyo’s atmosphere.” With tight lanes, you’ll be working on perspective and deciding what belongs in frame.
This is also where the guide’s composition advice tends to matter most. In narrow places, tiny framing choices decide whether your shot feels intentional or cluttered. If you get stuck, ask for a simple rule of thumb from your instructor: where to place the subject in relation to the brightest lights, and how to avoid blowing out the sign while keeping people readable.
Train hop to Shibuya: quick transit, big payoff
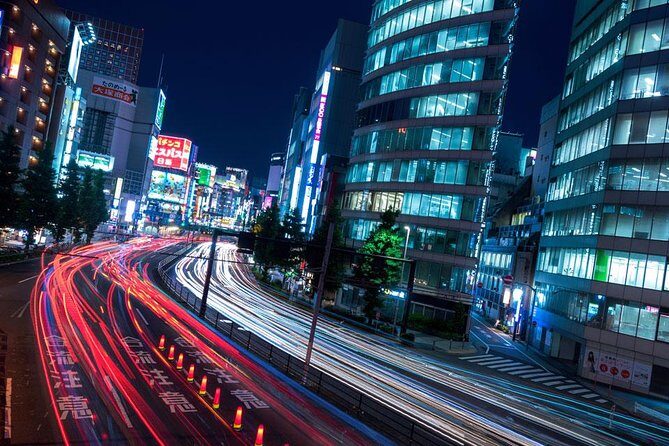
You’ll then travel from Shinjuku to Shibuya by train, and the transit cost is at your own expense. The tour is built so you don’t waste too much evening time commuting, because the intersection moment is the big finale.
Plan for crowd density during the ride and on arrival. Shibuya can feel like motion on top of motion. If you’re prone to getting separated, stay within arm’s reach when transferring and when you arrive at the crossing area. One of the less-fun moments on a night shoot is losing your guide in a sea of people, which can also make you miss instruction you could have used right then.
Stop 3: Shibuya Crossing for crowd timing and long-exposure drama
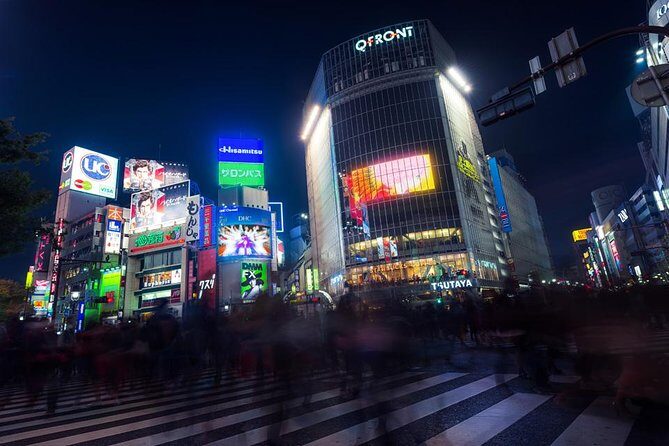
The tour ends at the Shibuya Crossing segment, roughly 45 minutes. This is the star stop, famous for the Blade Runner connection and for its sheer scale of movement. The challenge is that the best shots depend on timing: you’re balancing moving people, bright signage, and the exposure you chose.
In practice, you’re aiming for one of two looks:
- sharper crowd details with controlled brightness
- long-exposure effects that turn foot traffic and light reflections into trails and streaks
Because Shibuya Crossing is so bright, highlight control is everything. Your guide’s job is to help you avoid the common beginner mistake: letting the lights blow out so the image turns into a white haze. Even if you’re using a phone, you can often improve results by adjusting exposure/contrast and keeping your framing locked while the crowd moves through.
This is also where the “cyberpunk” feel really clicks. The combination of faces, jackets, illuminated storefronts, and moving streams of people can look like an urban sci-fi set—especially in photos where light trails guide your eye.
Practical settings for neon: getting usable results, fast
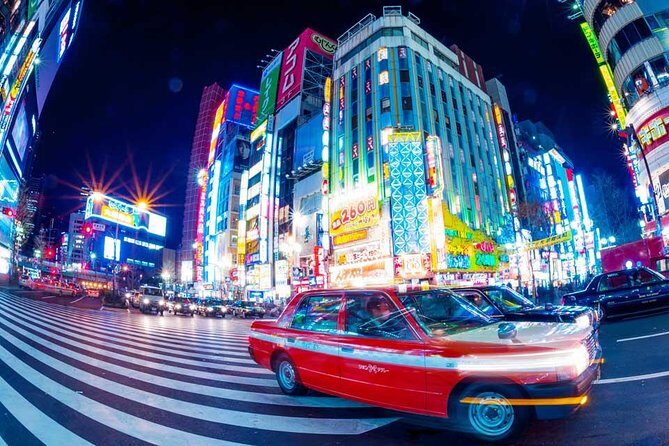
You’ll hear a lot about long exposure on this tour because neon lights are basically free light sources. But the real takeaway is simpler: you don’t need complicated gear to start making better night pictures.
If you use a camera, you’ll focus on shutter speed and exposure choices that let light register without crushing your image. If you use a smartphone, the instruction is still technical enough to matter—helping you find the right controls and avoid accidental adjustments. One person described how the guide helped them use phone tools like contrast and a lock function to keep the camera stable while they shot.
A tip that comes up more than once: if you have one, bring a way to steady your camera. A small tripod is helpful for longer exposures, and at least one guide recommendation leaned that direction. You don’t have to turn your evening into a tripod convention, but if you want the smooth long-exposure look, stability makes life easier.
Pace and group size: the good and the slightly annoying
The tour is small—up to 4 people—and that’s a major quality factor. In theory, small groups mean less waiting and more individual attention. In practice, you still need to manage your own pace in crowded streets.
Some people loved how the guide spent time on settings and made sure everyone shot what they came for. Others noted a drawback: the guide’s walking pace can be quick, and if you lag behind, you can lose track of where the group is. My suggestion is to treat this like a photo shoot, not a casual stroll: stay alert, keep moving when you’re supposed to move, and don’t pretend you’ll catch up later. If something is unclear, ask in the moment.
Also consider the weather. The experience is listed as requiring good weather. At the same time, at least one guide adjusted plans when it rained, so you may still get a shooting session even if conditions are less than perfect. If the weather is truly bad, you’ll be offered a different date or a full refund.
Price and value: is $184.99 per group fair?
The price is $184.99 per group (up to 2), and the tour typically books about 25 days in advance. That pricing structure matters because you’re paying for instruction plus a guided route at peak night hours.
Here’s how I judge value for this kind of experience:
- If you’re going to Shinjuku and Shibuya anyway, the biggest cost you avoid is time spent figuring out where to stand and how to set exposure for neon.
- You’re paying for real coaching. The difference between a decent night photo and a great one is often one or two setting choices and one framing fix. A pro guide can shorten that learning curve fast.
- You’re getting multiple distinct scenes in one evening: Kabukicho neon, Memory Lane texture, and Shibuya Crossing timing.
Is it “cheap”? No. But for a group of one or two, it often feels like good value because you’re not just touring—you’re learning to get better results with the gear you already have. And if you come with only a smartphone, the instruction can still produce images you’ll actually want to share.
Who should book this Tokyo cyberpunk street photo tour
Book it if you want:
- a guided way to shoot Shinjuku and Shibuya after dark without guessing
- technique help for neon long exposure (camera or phone)
- a guided route that includes iconic and lesser-known-feeling night scenes
- a small-group evening where someone corrects your framing and settings
Skip it if you:
- hate walking at night through busy areas
- want a slow, free-roaming sightseeing tour with minimal instruction
- can’t handle the pace of a group moving between tight shooting spots
If you’re on your first night in Tokyo, this can be a smart way to get your bearings fast through the camera lens. If you already know the neighborhoods, it’s still useful because the guide’s strength is translating lights and crowds into photos that look intentional.
Should you book it?
I’d book it if your goal is better night photos with less stress. The mix of Kabukicho neon, Omoide Yokocho’s tight street mood, and the payoff at Shibuya Crossing makes it feel like a complete Tokyo-after-dark photo session. And because you’ll get practical help using either a camera or smartphone, you’re not locked into fancy equipment to get good results.
If you do book, show up early to the Happy Lemon Shinjuku meeting point area, keep close as the group moves, and be ready to experiment. That’s where the best cyberpunk-looking shots come from.
FAQ
How long is the Tokyo Cyberpunk Street Photo Tour?
The tour runs about 3 hours (approx.), with the experience described as around 2.5 hours in the tour details.
How many people are in the group?
The maximum group size is 4 travelers.
What time does the tour start, and where do we meet?
It starts at 7:00 pm at the Happy Lemon Keio Shinjuku Shop, 1-chōme-1-4 Nishishinjuku, Shinjuku City, Tokyo.
Where does the tour end?
The tour ends at 2-chōme-2-1 Dōgenzaka, Shibuya, Tokyo.
What’s included in the price?
The price includes a professional photography instructor. The tour uses a mobile ticket.
Do I need a camera, or will a smartphone work?
You can use either a camera or your smartphone. The tour is designed for capturing neon signs and illuminated landmarks with both.
Is transportation included?
Bus fare is not included. There is also a train journey from Shinjuku to Shibuya at your own expense.
What happens if the weather is bad?
The experience requires good weather. If it’s canceled due to poor weather, you’ll be offered a different date or a full refund.
Is the tour refundable if I cancel?
No. This experience is non-refundable and cannot be changed for any reason.
Better Photos of Your Trip
More Tours in Tokyo

More Tour Reviews in Tokyo
Fresh reviews from around Tokyo

Photography Sessions, compared.
 ★ 4.8Tokyo Go-Karting Experience: Shibuya Crossing with PhotosFrom $90190 reviews
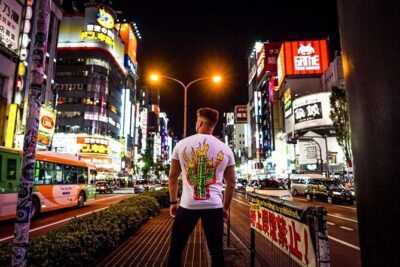 ★ 5.0Tokyo by Night Photography Tour (Private Option Available)From $105151 reviews
 ★ 5.0Tokyo Shinjuku Night Photo Tour with Pro GotaFrom $85142 reviews
 ★ 5.0Tour with Pro Tokyo Photographer and take Edgy Unique PortraitsFrom $14580 reviews
 ★ 5.0Tokyo Portrait Tour with a Professional PhotographerFrom $9258 reviews
Tokyo Asakusa: Miu Kimono Rental and Optional PhotoshootFrom $3254 reviews
★ 5.0Tokyo Portrait Tour with a Professional PhotographerFrom $9258 reviews
Tokyo Asakusa: Miu Kimono Rental and Optional PhotoshootFrom $3254 reviews
 ★ 5.0Photo Shoot with a Private Vacation PhotographerFrom $28353 reviews
 ★ 5.0Tokyo Authentic Kimono Rental in Asakusa with Photography OptionFrom $4546 reviews
Browse the lists this tour appears in